Email Support
We do not offer technical support for third party email software or devices and recommend finding the vendors documentation to add and manage accounts. Any information regarding third party email software is provided for information purposes only.
If you are having any problems with your webmail or with managing your email accounts in your cPanel, please contact us directly or check official cPanel documentation here.
- Email Support Articles
- Premium Email
Setting Up Your Email Account in Microsoft Outlook 2003 & 2007
(Please note there are various version of Microsoft Outlook available, your particular version may be slightly different then the process outlined below)
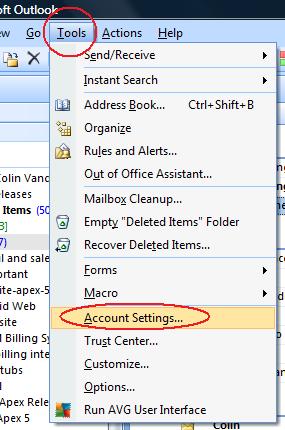
1. Go to 'tools' -> 'Account Settings' in your menu
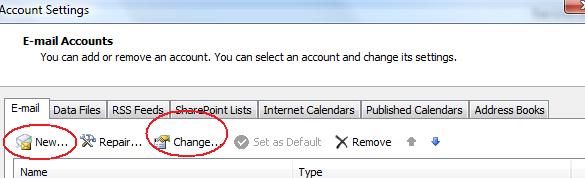
2. A box will pop up. If you are adding a new email account, click the 'new' button. If you are editing an existing email account, click that email account in the list once to select it, then click the 'change button. If you 're editing an existing account, skip to step 6, otherwise proceed to step 3.
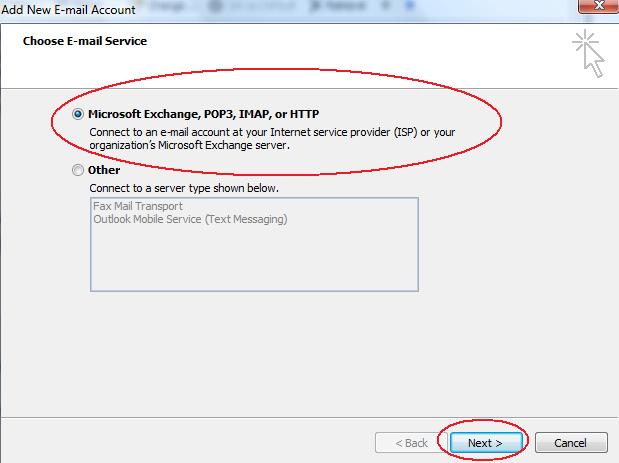
3. Choose the first option and click 'next'
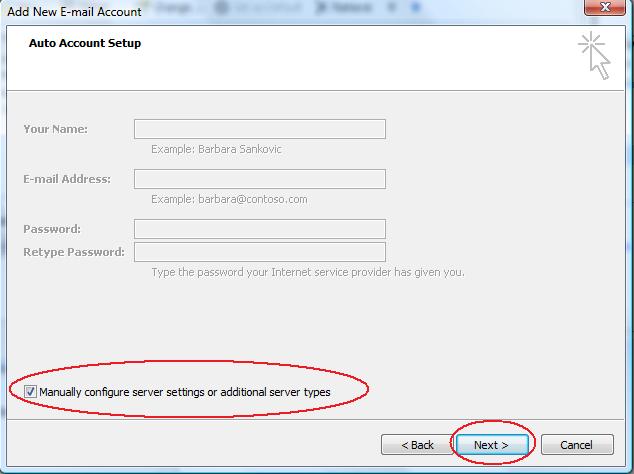
4. On the following screen. Choose the option to manually configure your account, and click the 'next' button.
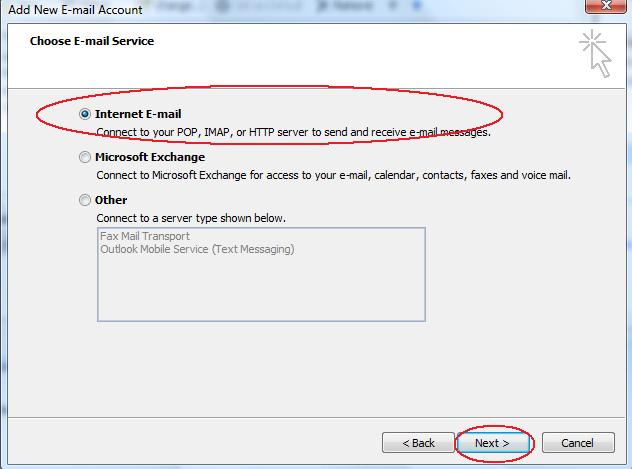
5. On the following screen, choose internet email and click the next button
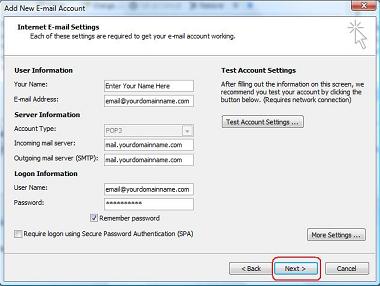
6. Enter your account settings as follows:
- Your Name - enter your name here
- Your Email Address - Enter the email address you are going to be using here (note, it must be set up in your cpanel already)
- Account Type - POP3 works well for most users, however, our servers also support IMAP connections.
- Incoming & Outgoing Mail Servers - enter: mail.yourdomainname.com for both. Replace 'yourdomainname.com with your actual domain name.
- Username - Enter your full email address here
- Password - Enter the password that was assigned to your email account when it was set up in cpanel.
- Remember Password - check this option.
After you've entered in the above information, click on the 'more settings button!

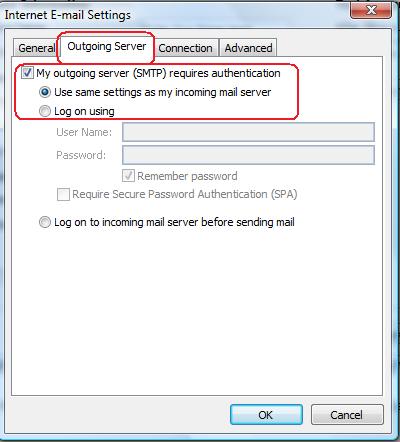
7.In the 'more settings' dialogue box, go to the outgoing server tab.
- Check off the option that says "My outgoing server (SMTP) requires authentication.
- Then choose the sub-option that says "Use same settings as my incoming mail server".
- Do not hit 'ok' yet, instead, proceed to the advanced settings tab.
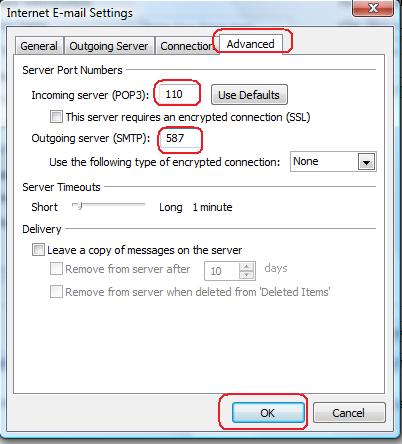
8. Still in the 'more settings' dialogue box, proceed to the 'advanced settings' tab.
- For the incoming server port, enter 110 if you are using POP3 email. Or enter 143 if you are using IMAP email. (POP3 is the default)
- For the outgoing mail port, both 25 or 587 will work with our servers, however, many internet service providers block port 25, so we suggest trying port 587 first.
- Click 'OK' to save your settings and close the 'more settings' dialogue box
9. Click 'next' then 'finish' to save your account.

10. Congratulations, your account is now set up.