SiteApex Administration Help & Tutorials
Please use the topic links below to see a list of tutorials for that particular topic or module. Or you can use the search button to search for help on a specific topic.
Note: there are a few non-default modules listed here. Please contact sales if you are interested in any of these modules.
- Getting Started
- Page Editing
- Ad Manager
- Blog Module
- Bulletin Board (BBS)
- Calendar Manager
- File Manager
- Form Builder
- League Module
- Media & Resource Library
- News Letters
- News Manager
- Photo Album
- Staff List
- Shopping Cart
- Directories Module
- Indexed Articles
- Questionnaires
- Job Posting
- Mobile Devices
- Control Panel
- SMTP - Outgoing Mail
- Security & User Groups
- Templates
- Plugins
- SEO
- WCAG / Website Accessibility
Creating a Media & Resource Library
The Media & Resource Library organizes media and files into folders which are contained in a Library. Your site can have unlimited libraries and folders within those libraries. Amount of files will depend on their size and the disk space allotted to your hosting plan.
Libraries can be added to pages of your website and can set up with different security levels. Here is how to create a library and place it on a page.
Modules are managed though the Modules menu. Click on Modules in the top left menu and select "Media & Resource Library from the menu on the left.

This will load any current Libraries and the Media & Resource Library Menu.
Media & Resource Library Options
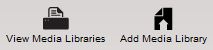
View Media Libraries: Displays all current libraries
Add Media Library: Allows you to add a new library
Creating a Media & Resource Library
- Click on Add Media Library in the top right menu
- You will be given a form page to enter information about your new library
- When you are finished entering information, press [submit] at the bottom to create the library
- This library will now appear when you "View Media Libraries.
Note: Creating a library does not make the library live on your website. You will have to create a Library Page to display the library on (see Setting up a Media & Resource Library page).
Options
Name: This is the name of your library. This name is visible only to people who are logged in to the website admin.
Security: The Media & Resource Library module has very advanced security options. These permissions are detailed below and can be set by group. The most important settings to check are "Public Access" which determines what visitors to your website can do and the "Administrators" group, which should have ability to control most, if not all of the items in your library.
Allow Download Once: If this option is set to "Yes", logged in users will only be able to download a file once.
Podcast: You can set up your Library to generate a feed that users can subscribe to, or can be used to pull your media files into another website. If using this option, you will want to give a title for your feed and a link back to your website or library page.
Security
Group: "Public Access Rights" determines what every visitor to your website can do in your library. Select other User Groups from the drop downs to give special permissions to the people in those groups. (Learn how to set up groups.)
Admin: If checked, this group can login to the the library.
Download: If checked, these people can download files. Downloads are unlimited, unless you select the "Allow Download Once" option. (Note: this option only works for logged in users.)
Add Directories: Gives users the ability to add new folders to the library.
Edit Directories: Gives users the ability to edit existing folders in the library.
Delete Directories: Gives users the ability to delete existing folders in the library.
Add Files: Gives users the ability to upload new files to the library.
Edit Files: Gives users the ability to edit existing files in the library.
Delete Files: Gives users the ability to delete existing files in the library.
Lock Files: Gives users the ability to "lock" a file and prevent others from editing it. This can be useful if multiple people are responsible for updating a library. While one user has a file "locked" the others can't edit or delete it.
Note: Need to select more groups? Submit and edit the library again to get more group security rows.
Once your Library is set up and added to a page, you can login to the Library right on your live website to begin adding folders and files.