SiteApex Administration Help & Tutorials
Please use the topic links below to see a list of tutorials for that particular topic or module. Or you can use the search button to search for help on a specific topic.
Note: there are a few non-default modules listed here. Please contact sales if you are interested in any of these modules.
- Getting Started
- Page Editing
- Ad Manager
- Blog Module
- Bulletin Board (BBS)
- Calendar Manager
- File Manager
- Form Builder
- League Module
- Media & Resource Library
- News Letters
- News Manager
- Photo Album
- Staff List
- Shopping Cart
- Directories Module
- Indexed Articles
- Questionnaires
- Job Posting
- Mobile Devices
- Control Panel
- SMTP - Outgoing Mail
- Security & User Groups
- Templates
- Plugins
- SEO
- WCAG / Website Accessibility
Adding & Editing Additional Product Options
Product options are helpful if you are selling a product like a T-shirt that comes in multiples sizes and or colors.
You can add additional product options to products in your shop cart using the 'manage options' link button at the bottom of the product details page in your shopping cart administration area.
Here is an example of a shop cart product that has options available...

Product options have option categories and then further sub-options that you can place in each category.
An example of a option category might be 'Size', then the category sub-options might be S, M, L, XL.
Let's start by creating a option category called 'Size' (you can call your option whatever you wish). First, click the 'manage options' button at the very bottom of the page where you edit your product details in the shopping cart admin area. The button looks like the below image...

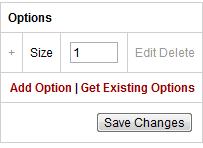
Next, in the popup that comes up, click the 'add option' link, then click 'extension group'.
You should see the following screen. In my screenshot below, I've already filled out some details which I'll explain in a moment.
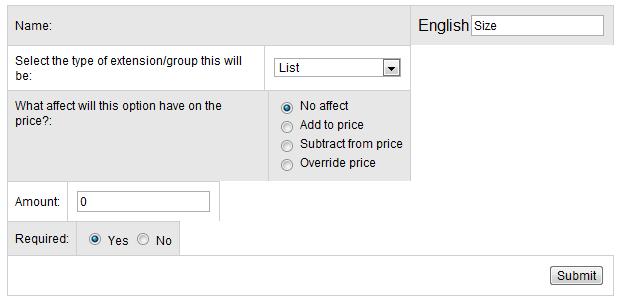
- Name - this is what will appear beside the list of product options when someone is checking out this product on your website. In the screenshot of the candle product earlier in this article, the name field is 'Colour'
- Extension Group Type - this is how your customer will choose what option they want. You can have them use a drop down list box, radial buttons, check boxes, etc. Again, in the candle example earlier, this person choose to use a list. The list is also my personal favorite as I find it keeps things nicely organized.
- Price Effect - If a customer chooses any options (we'll add these in a later step) within this option group, You can choose what affect will this have on the price of your product. (note you can leave this as 'no effect', and customize the price impact in the individual production we'll set up in a moment.)
- Amount - If you choose to have an affect on price above, then specify the cost here.
- Required - Does the customer have to choose an option from this product group before they can add this product to their shopping cart - example, you would probably want to specify 'yes' if you were selling a t-shirt and you need the customer to specify what size they want to order.
Click submit when you're done.
Now, you will want to add some options to this option group. For my product, I created a size option group, so now I want to add some size options like Small, Medium... etc.
We do this by clicking 'add option' again, then click 'extension'

You should now see the following screen...
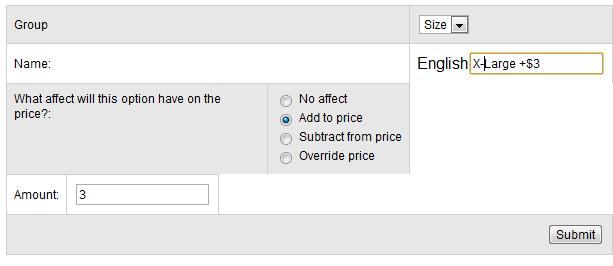
- Group - choose your product option group here that you created in the previous steps
- Name - what is the name of your option? I'm creating a T-shirt size here that is extra large
- Price Effect - I'm choosing to charge my customers an additional $3 to get this bigger size of t-shirts.
- Amount - This is where you fill in the amount of the price effect you choose above.
When you're done, click submit. Repeat this process for each option you want to add. In my screenshot below, you can see I've added a total of four options to the size option group I made earlier. I've chosen to charge $3 extra for the x-large and xx-large sizes.

Now that you've added an option group and several options to that group, you should be able to see them on your product in the shopping cart...

That's it! However, if you want to add more option groups and options (perhaps a Color option group, with several color options?) You can repeat this process as many times as you need to for each product. However, to keep things simple for your customers, we do recommend keeping it to 3 or less option groups.
Already Created Option Categories and Options that you want to reuse for another product?
No problem, you can use the 'get existing options' link. First, click the same 'manage options' button at the bottom of the product page in your shopping cart admin area.
Then, click the 'get existing options' link in the box that pops up.
Then choose the product that already has the product options that you would like to reuse and click 'submit'
This will import all the same product options so you can reuse them without have to create them over and over again for each product you add.