SiteApex Administration Help & Tutorials
Please use the topic links below to see a list of tutorials for that particular topic or module. Or you can use the search button to search for help on a specific topic.
Note: there are a few non-default modules listed here. Please contact sales if you are interested in any of these modules.
- Getting Started
- Page Editing
- Ad Manager
- Blog Module
- Bulletin Board (BBS)
- Calendar Manager
- File Manager
- Form Builder
- League Module
- Media & Resource Library
- News Letters
- News Manager
- Photo Album
- Staff List
- Shopping Cart
- Directories Module
- Indexed Articles
- Questionnaires
- Job Posting
- Mobile Devices
- Control Panel
- SMTP - Outgoing Mail
- Security & User Groups
- Templates
- Plugins
- SEO
- WCAG / Website Accessibility
How To Add Links
Adding a Link to a Website
 Type or copy/paste the text to be linked
- Highlight the text to be linked
- From the menu, select the LINK icon
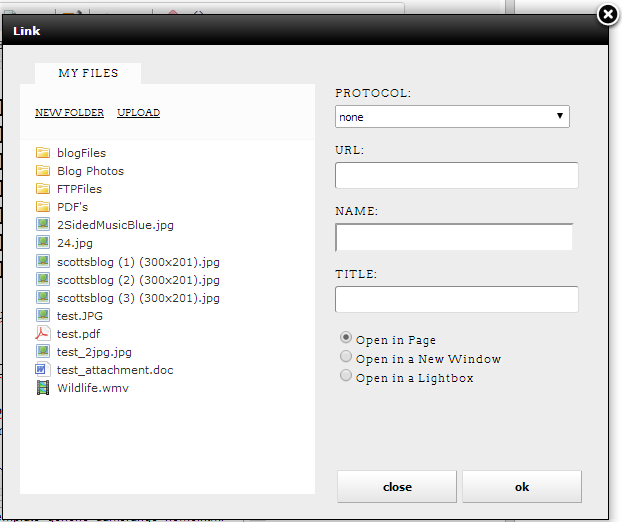
- A pop-up menu appears
- Protocol: Choose the protocol appropriate for your link. Typically http:// will do the trick, you don't need to have this here and in the URL line.
- URL: type the website address
- Title: Descriptive text about a link. This will appear when the mouse hovers on the link and text readers will read this text to describe what the link is. Recommended but not required for WCAG compliance.
- Choose where you want the link to take the user when clicked. Take note if you are doing an external link to another website we recommend using "Open in a new window".
- Click Insert to create the hyperlink.
Adding a Link to an Email Address
Follow the steps for adding a website link (above) only select "mailto in the Protocol drop down.
Adding a Link to Another Page on your Website
 Type or copy/paste the text to be linked.
- Highlight the text to be linked.
- From the menu, select the INTERNAL LINK icon.
- A pop-up appears.
- Select the page you want to link to from the list.
- The pop-up will close automatically.

Tip: Images can be links, too. Simply select the image you want to link by clicking on it and then follow the steps to add a link (above).
Turning an Image Into A link
 Click on the image in your editor so it is selected.
- From the menu, select the LINK icon.
- A pop-up box appears.
- Protocol: Choose the protocol appropriate for your link. Typically http:// will do the trick, you don't need to have this here and in the URL line.
- URL: Type the website address.
- Title: Descriptive text about a link. This will appear when the mouse hovers on the link and text readers will read this text to describe what the link is. Recommended but not required for WCAG compliance.
- Choose where you want the link to take the user when clicked. Take note if you are doing an external link to another website we recommend using "Open in a new window".
- Click Insert to create the hyperlink.
Adding a Link to Another place on the same Page
Anchoring or BookmarkingThe function you want to use to use to link to another position of the page are called anchor tags. Here are some instructions on how to setup this feature. You can add anchor tags to any page with the SiteApex Editor bar this includes the Newsletter.
- Type the text (or highlight existing text) you want to send the user to and highlight that area with the cursor.
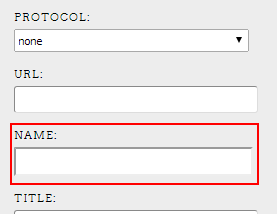
- Click on the "Hyperlink" button on the editor and select "none" for protocol. Type in a name for this Anchor spot in the Name field with no spaces or numbers. Click Insert.
- Once you have set your anchor, select the text or image you want them to click on to take them there. Well that text or image is highlighted/selected click on the "Hyperlink" button in the editor.
- In the hyperlink pop up window select "none" in the protocol drop down and type in pound # and then type in the name you gave the anchor in the "URL" field. Example #LinkHere
- Click Insert.
Adding a Link to Another place on a different page
The function you want to use to use to hyperlink to a position on another page. Here are some instructions on how to setup this feature.
- On the page they are being sent to, type the text (or highlight existing text) you want to send the user to and highlight that area with the cursor.
- Click on the "Hyperlink" button on the editor and select "none" for protocol. Type in a name for this Anchor spot in the "Name field" with no spaces or numbers. Copy the name for step 5.
- Click Insert.
- Submit the the page to save settings.
- Edit the original page they will find the link on and select the text or image you want them to click on to take them there. Well that text or image is selected click on the "Internal Link" and click on the page they will be going to on your website.
- Still on that text now open the hyperlink box and add # and then paste the copied name at the end of the URL. It should look similar to domainName.com/webPage.php#bottom
- Click Insert.
- Submit the page to save settings and Publish site to try this live.