Email Support
We do not offer technical support for third party email software or devices and recommend finding the vendors documentation to add and manage accounts. Any information regarding third party email software is provided for information purposes only.
If you are having any problems with your webmail or with managing your email accounts in your cPanel, please contact us directly or check official cPanel documentation here.
- Email Support Articles
- Premium Email
Setting Up Your Email Account in Mozilla Thunderbird
(Please note there are various version of Mozilla Thunderbird available, your particular version may be slightly different then the process outlined below)
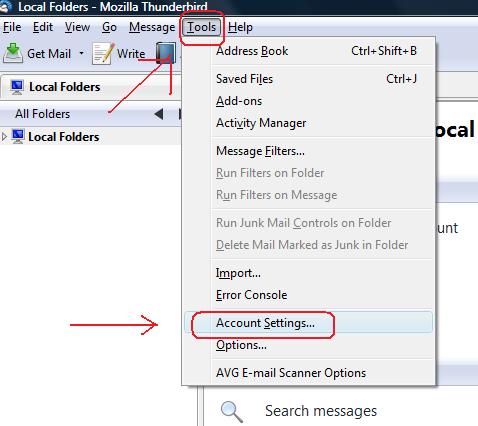
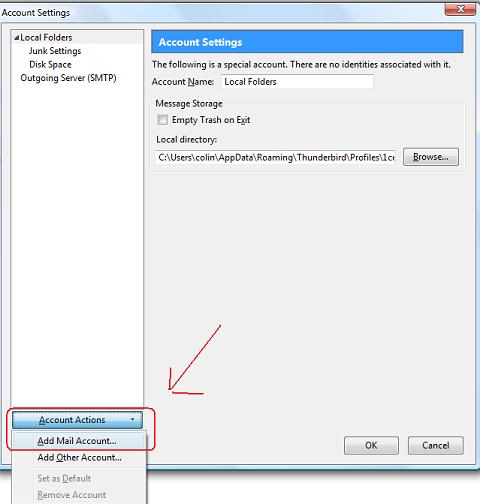
2. In the box that pops up, click the 'Account Actions' button at the bottom left, then choose 'add mail account'
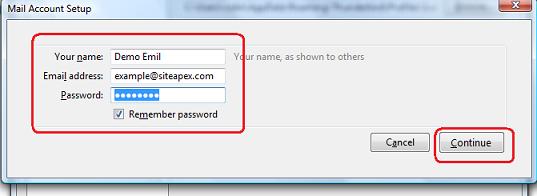
3. Fill out your name, your email address and the password for your email account. Make sure remember password is checked off. Then click continue.
4. When you click 'continue' in step 3, Thunderbird will attempt to automatically set up your account for you. This is what my Thunderbird automatically set up for my example account (yours may be different). I recommend clicking the edit button and manually changing the settings to something you can be sure will work.
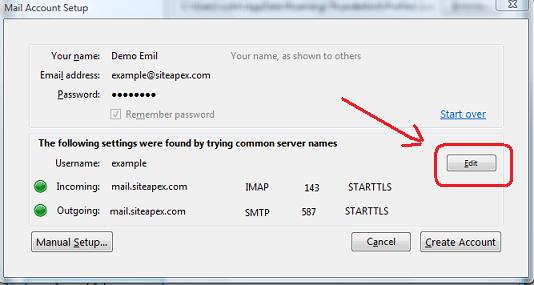
5. Once you've clicked edit in step 4, another box will pop up where you can customize the connection settings for your email account. Look beneath the screenshot below to see what settings you should use for each field.

a) Your Name - enter your name as you would like it to appear on the 'from' field in emails you send out
b) Email Address - enter your email address
c) Password - Enter the password for your email address, make sure 'remember password' is also checked off
d) Username - enter your full email address here
e) Incoming - enter mail.yourdomainname.com (replace yourdomainname.com with your actual domain name - ie mail.siteapex.com). In the drop down box next to it, choose either IMAP, or POP for your connection type. If you choose IMAP, enter 143 in the next box. If you choose POP, enter 110 in the next box. Change STARTTLS to NONE.
f) Outgoing - should say mail.yourdomainname.com (replace yourdomainname.com with your actual domain name - ie mail.siteapex.com). For the port, you can either use port 25 or 587. We recommend trying port 587 first. Change STARTTLS to NONE.
6. When you're done inputting the above settings - click on the retest configuration button to confirm your settings work. Thunderbird may issue warnings because STARTTLS was changed to 'NONE' above. The settings should still work despite the warnings. Go ahead and click 'create account',
6. When you're done inputting the above settings - click on the retest configuration button to confirm your settings work. Thunderbird may issue warnings because STARTTLS was changed to 'NONE' above. The settings should still work despite the warnings. Go ahead and click 'create account',

7. Your account should be set up now. However, there are a couple more things you will need to do...
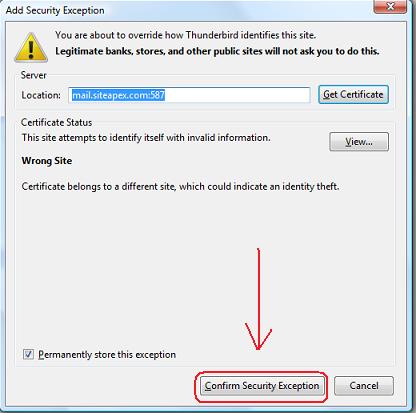
a) The first time you try to send an email. Thunderbird may present you with a security exemption pop up box. When this pops up, click on 'confirm exemption.
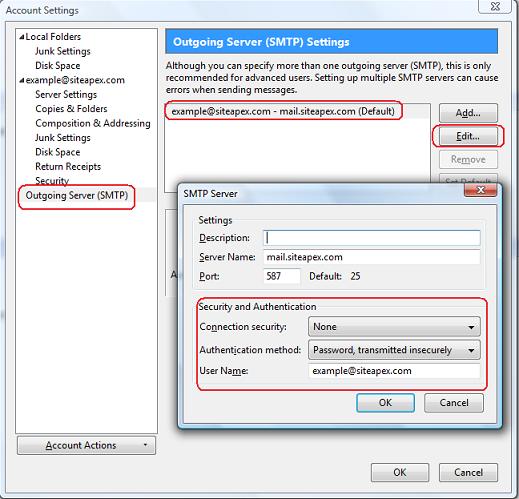
b) If you're still having trouble sending email, go back into 'tools' -> 'account settings', then open up the outgoing mail server settings. Make sure the connection security is still set to 'none' and that the username is your full email address