SiteApex Administration Help & Tutorials
Please use the topic links below to see a list of tutorials for that particular topic or module. Or you can use the search button to search for help on a specific topic.
Note: there are a few non-default modules listed here. Please contact sales if you are interested in any of these modules.
- Getting Started
- Page Editing
- Ad Manager
- Blog Module
- Bulletin Board (BBS)
- Calendar Manager
- File Manager
- Form Builder
- League Module
- Media & Resource Library
- News Letters
- News Manager
- Photo Album
- Staff List
- Shopping Cart
- Directories Module
- Indexed Articles
- Questionnaires
- Job Posting
- Mobile Devices
- Control Panel
- SMTP - Outgoing Mail
- Security & User Groups
- Templates
- Plugins
- SEO
- WCAG / Website Accessibility
Adding and Uploading New Ads
The ads module is typically used on your homepage design as the hero image. It can be used on individual pages though as a module.
Ads are individual images that are uploaded and displayed in a campaign. Your image or Ad must be created before hand.
Ad Requirements
- Supported File Formats are JPG, GIF and PNG.
- It is recommend the image you are using is exact or similar in size and shape to the size and orientation of your campaign.
- If it is to small the file will not upload and warn you it is too small
Ad Features
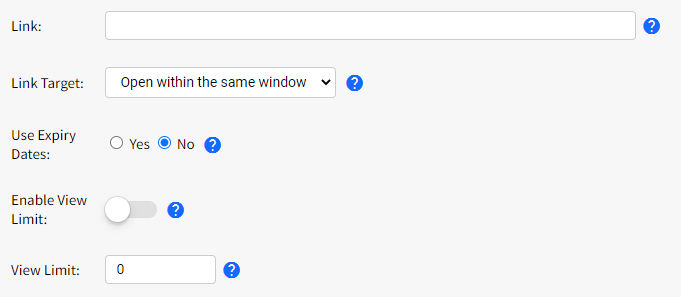
- Set links on each Ad. Create a unique page on your website for your ad if you have the content and link to this page from your Ad.
- Automatically schedule your Ads to appear and disappear.
- Set a view limit to restrict how many viewers can see the Ad. Ideal for a limited campaign or sale on a product.
How to Upload a New Ad Image
- Under Modules in Use menu click on Ads.
- Click on Manage Ads on the Campaign line you want to add new Ad too.
- Finally, click on the Upload New Ad button to get started.
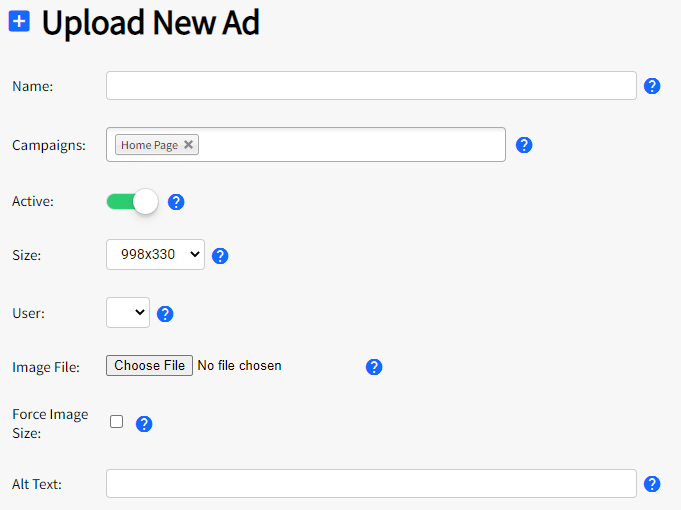
- On the Ads Edit screen at minimum you must have a campaign selected, Size and choose an Image off your local device to have an Ad created.
Using the instructions exactly as listed here your Campaign and Size field should be pre-populated with the correct settings for your Ad.
- When you click Submit the Ad will upload and add itself to the Campaign. It will be live by default.
If the image is not the same size as your Campaign you will be given a chance to crop the image to the Campaign size. choose your preferred crop area and click Submit.
Ad Settings Overview
Troubleshooting
There area few reasons an image you have added is not displaying correctly or not displaying at all.
- If your image is not sized to the campaign it will simply display the top middle of the image. Thus possibly cutting out important information. It's usually best to create your images or edit them to the size of your campaign. This will optimize the display of the image.
- Ensure that you are using a plain JPEG file. Be aware that some editing image optimizers might prevent the image from displaying at all or from uploading. For example using a tool like JPEG Mini.