SiteApex Administration Help & Tutorials
Please use the topic links below to see a list of tutorials for that particular topic or module. Or you can use the search button to search for help on a specific topic.
Note: there are a few non-default modules listed here. Please contact sales if you are interested in any of these modules.
- Getting Started
- Page Editing
- Ad Manager
- Blog Module
- Bulletin Board (BBS)
- Calendar Manager
- File Manager
- Form Builder
- League Module
- Media & Resource Library
- News Letters
- News Manager
- Photo Album
- Staff List
- Shopping Cart
- Directories Module
- Indexed Articles
- Questionnaires
- Job Posting
- Mobile Devices
- Control Panel
- SMTP - Outgoing Mail
- Security & User Groups
- Templates
- Plugins
- SEO
- WCAG / Website Accessibility
Creating A Newsletter
![]()


This article explains how to create a newsletter.
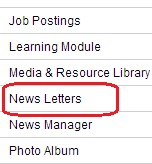
1. First, go to 'modules' (top menu) -> 'news letters' (left hand menu)
 |
 |
2. Click the 'add' button (top icons menu) to start creating a new newsletter

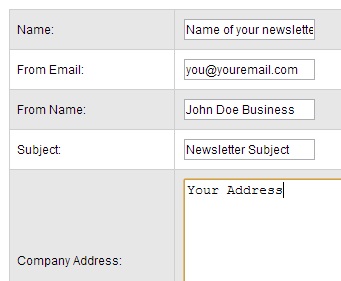
3. Fill in the top fields...
- Name - this is the name of your newsletter which will show in the admin area of your website. Recipients of the newsletter will not see this, it's for administrative purposes only.
- From Email - This is the email address that the newsletter will show as being sent from. You can insert any email address you like, but we recommend using a real email address that you have access to in order to help your newsletter bypass spam filters.
- From Name - When a recipient receives your newsletter, the from name is the name that will show as being the sender of the email. Enter your business name or personal name here.
- Subject - This is the subject of your newsletter that will show in the recipients inbox.
- Company Address - enter your company or personal address here. While this is optional, we recommend entering your address here as it helps your newsletter to get through spam filters.

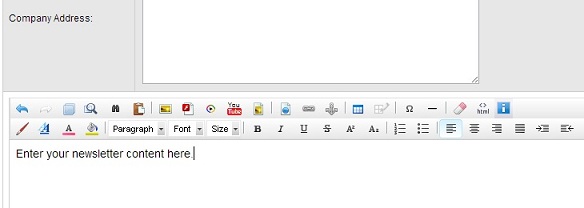
4. Enter the content of your newsletter using the html editor.
You can add click through links as well, to learn about those, please click here (opens in new window).

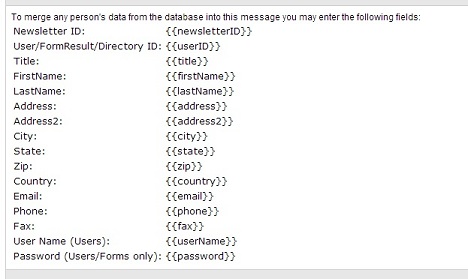
5. While you're entering your newsletter content, you can also add personalized fields using the personalized fields below the html editor (see pic below). So for example, if you have saved the first and last name for each of your subscribers, you can personalize each newsletter that goes out to your subscribers using 'Hello {{firstName}} {{lastName}}'. If the subscriber's name was John Doe, then the newsletter he receives would say 'Hello John Doe'.

6. When you're done creating your newsletter, click the save button at the bottom of the page to save it..

7. When you're ready to send your newsletter, follow these steps.
