SiteApex Administration Help & Tutorials
Please use the topic links below to see a list of tutorials for that particular topic or module. Or you can use the search button to search for help on a specific topic.
Note: there are a few non-default modules listed here. Please contact sales if you are interested in any of these modules.
- Getting Started
- Page Editing
- Ad Manager
- Blog Module
- Bulletin Board (BBS)
- Calendar Manager
- File Manager
- Form Builder
- League Module
- Media & Resource Library
- News Letters
- News Manager
- Photo Album
- Staff List
- Shopping Cart
- Directories Module
- Indexed Articles
- Questionnaires
- Job Posting
- Mobile Devices
- Control Panel
- SMTP - Outgoing Mail
- Security & User Groups
- Templates
- Plugins
- SEO
- WCAG / Website Accessibility
How to use the Popout Plugin
Pop-ups are a great way to feature something important on your website. You can display an urgent message, display marketing material, or with a form; ask for their contact information to receive a newsletter or to simply contact you. This tutorial will explain how to add this to your website, change the way your pop-up displays and add and edit its content.
If you are unfamiliar with managing your template plugins we recommend starting with Managing your Template's Plugins.
Adding the Popout Plugin to a template
- In the left main menu hover over Control Panel
 . Click on Templates
 - Then click Plugins on the template you wish to add the Pop-up too.
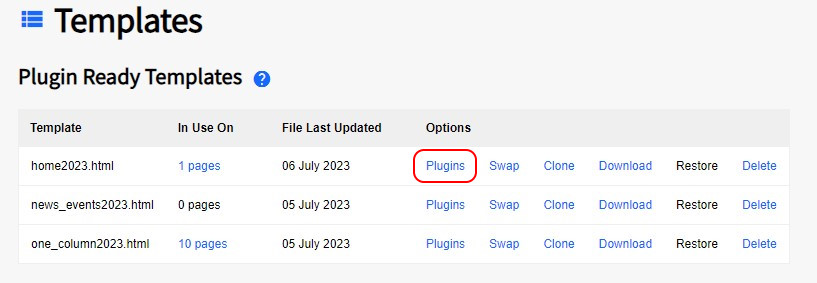
Note: A new window will open displaying your templates framework and all the available Plugin positions on this template. 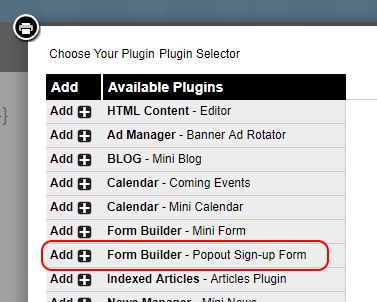 Find a plugin position that is not used or Edit an existing plugin and swap it for Form Builder - Popout Sign-up Form. Simply click on it's name in the plugin selector to use it. After selecting this plugin the edit screen will display.
Note: The position of your plugin in the template does not matter. You can control how the popout displays by choose from the display modes.
Popout Display Modes
We have provided 3 different display modes to allow some creative freedom when using the pop up plugin feature. Each popout mode also has some of it's own unique display options. Both Forms and Content display are supported in all 3 popout styles.
The popout from screen edge option displays a small pop up box that "pops" in from the right edge of your website.
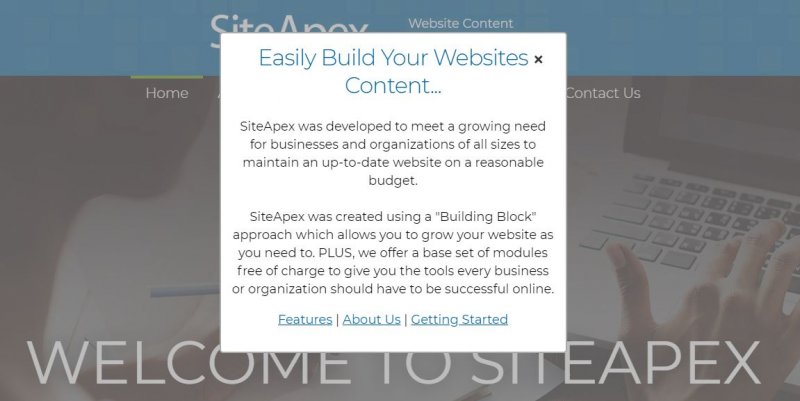
The overlay on top of website option will display on top of your entire website as a modal popup box. Users can click away with the close icon or by clicking outside the popup.
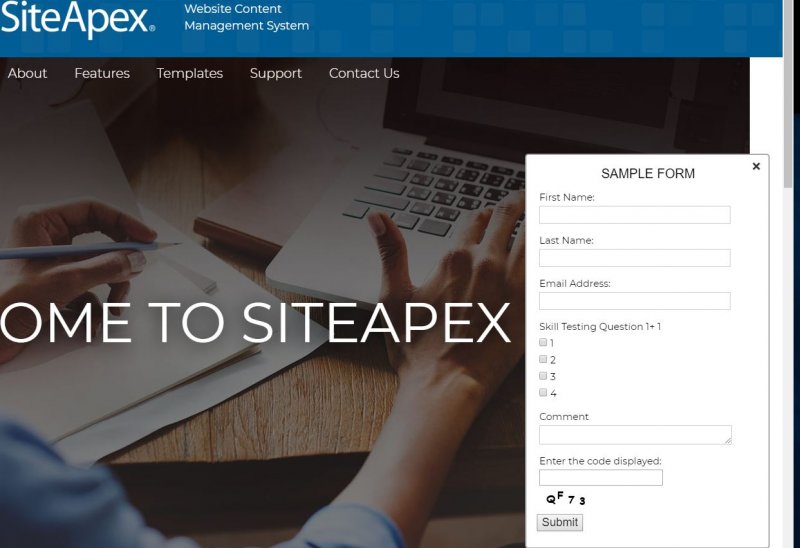
The "Subscribe" Tab displays on the right side of your website. It sticks in position in order to remain in view as the visitor scrolls down the page. When clicked the popup slides out from the edge of the screen in a smaller pop up box similar to the first display type.

Key Display Mode Options
Popout from screen edge options
- Display on page scroll decides how far down do they need scroll before the popout occurs from the edge.
- Display when page finishes loading lets you decided how quick the popout occurs after the page is loaded.
- Display upon Form Builder or Shopping Cart submission. If this popup plugin template is used on Formbuilder or Shopcart pages the submit process of each module can trigger to display the popup. Good for follow up messages or additional marketing you might want to present.
Overlay on top of website options
- Display when page finishes loading lets you decided how quick the popout occurs after the page is loaded.
- Display upon Form Builder or Shopping Cart submission.
"Subscribe" Tab - Always visible tab, click to expand. You can customize the tab's text if using this mode.
Cookie Life Span
Set the length in hours the popup will not display again after the visitor has closed the popup once. Not applicable to tab mode.
Type Of Plugin
After deciding the display mode. You can choose to display either a Formbuilder form on your popup or content using the SiteApex editor.
Form
The form option allows you to select one of your forms to display in the popout display. Although, it is recommended to use a fairly short form for display purposes. Ideally a simple contact form or newsletter subscriber form would fit and allow your visitors quick access to these forms.
Key Form Display Options
- Form Selector - select the Form you wish to display on the popup
- Page to Submit to - this option lets you decide what happens when they complete the form. You can keep them on the popup or take them to an existing form page to display the thank you message
- There are a variety of design options including setting the text box width, size of each row, size of column width, where the required field symbol displays, customize the Submit button and position and if you want the Forms Name or Intro text to display.
Content
The HTML content editor option allows you to add your own content. Use the editor to format text, add photos and links to your popout similarly to how you add content to your pages.